Showing posts with label project. Show all posts

3.17.2011

What to do with an empty can:

I was cleaning up after lunch today and went to put away the can of Gatorade my husband had used but found that it was empty.  I rinsed it out and got ready to recycle it when I thought, "Hm, maybe I can recycle it into something useful!" 

If you have young girls at home, you know how messy the "hair" drawer can get.  It spews barrettes, bows and ribbons every time I open it.  It's so overwhelming that I hardly use any of the accessories because I just don't want to take the time to organize them all.

I had a bright idea!  Let's use this old can to make an organizer for our bows!

This would also work for any other organizing need and the great thing about it is that it's free!  You just use the leftover fabric scraps and ribbons you have around your house.

Here's what you need:
1.  Cleaned coffee/Gatorade/large can
2.  Remnant piece of fabric large enough to cover the can
3.  Ribbons/trim to beautify!
4.  Hot glue gun


Step 1:  Cut your fabric with enough leftover to tuck under the bottom and into the top of the can.  I left about 3/4in for the bottom and about 2in for the top (just so I didn't see the can looking right at it).
Step 2:  Wrap and glue the fabric around the can.  It's nice to have a fabric that has a bit of stretch/give so you don't have to be perfectly lined up each time you glue.  I used a light linen I had leftover from this project.  I only glued the beginning edge along the whole height of the can and then the very end the same way.  I didn't glue anything around the top or bottom edges since it will be tucked under/over later.


Step 3:  Pull the bottom edges of fabric over the bottom edge of the can and glue.  Don't worry about trimming all the strings.  You can if you want to, but I like the homemade/rustic look of leaving them.


Step 4:  Turn the can over and tuck the top edges of the fabric inside the can and glue.  This can be a little difficult depending on how much fabric you left to tuck in.  Go ahead and trim some off if it's too hard to reach your glue gun inside the can.


Step 5:  Add ribbon and trim however you want!  Since it's almost Springtime, I wanted to use some organic and Springy colors.


Final Product:
 
I clipped some flower clips I made around the top for easy access.  I glued a bit of ric rac around the middle and left portions unglued and away from the can's surface so I can clip barrettes and bobby pins to those instead of digging around inside the can to find them.  I'll probably store combs and bigger things inside the can.


2.26.2011

Homemade gifts are always better

You know how when you want to give a gift to someone and you want it to be memorable, how hard it is to find the perfect gift?  I'm rarely satisfied with the options I have to purchase.  Not that they're not nice quality or that the person won't like them but I know it will most likely be a gift that's forgotten and won't have any sentimental value to it.

My precious niece, Olive, whose birth I witnessed, is turning one!  I can't believe its already been a year.  Her mom is throwing a birthday party today and I wanted to get Olive something special.  I know she's only one and doesn't have any clue about what's going on and won't remember anything about this day but I wanted to get her something special.

I had the crafty itch and decided to see what I could come up with.  My sister said Olive loves to take things out of bags and put them back in.  She could do it all day long.  I thought it would be fun for Olive to have her own little bag instead of disassembling mom's purse every time she got the urge.

I pulled out some scraps and this is what I came up with:


It is the simplest of bags and only took about a half hour to sew but it will serve it's purpose!

Now, something to go inside the bag.  I started looking for baby toys online and was reunited with the wonderful site called The Purl Bee.  It's awesome!!  She has tons of tutorials and even sells sewing and knitting supplies.  She had this tutorial for a toy she called "Best Bunnies".  I thought they were so cute and perfect for a one year old!  This is how mine turned out.  It is one bunny with alternating fabrics and the bunny has 2 faces, one on each side.


9.23.2010

a home for my yoga mat

I'm feeling quite refreshed and happy after practicing yoga last night--so much that I'm still thinking about it almost 24 hours later.  Well, why not do something yoga-ish then?!

So I made this.  With no pattern.  This is all you have to do:

1.  Measure your mat's length and circumference.  Add 3 inches to both measurements.  Example:  My mat's circumference is 13 inches and is 24 inches long.  My fabric measurements are 16" by 27".  I just used a piece of scrap fabric from another project. 

2.  Cut a strip (matching or not) about 3" by 27" (the same length as your first piece).  If you want a wider strap, go with 4" by 27".

3.  Cut 2 circles using an object in your house that has the same circumference as your mat + 4" (so mine is 17").  I used a tray for a bunch of blank DVDs.  Keep the circles together with right-sides out.  Baste if you want. I hate basting and pinning so I usually don't.

4.  Sew the strip, right-sides in, length-wise.  Sew one end of the strip closed.  Turn right-side out.

5.  Sew the main piece of fabric, right-sides in, up the side.

6.  Sew the circle pieces to the bottom of your main piece (circles are still right-sides out and back to back, main piece is still right-sides in).  I didn't pin mine, I just held the edges as I went.  It's easier if you keep the circle piece on bottom and your main piece on top as you go around the edges so you can use circle as a guide.

7. Hem upper edge of case. You can either add a drawstring here or add a snap or button for closure. Or leave it open. Totally up to you!

8. Turn your work right-side out. You're almost done!

9. Attach the strap about 3" from bottom and top (tuck the edges in on the open end of the strap before sewing to leave a clean edge).


Namaste

7.29.2009

Sophie Dress and Jonah Pants

I'm still here! Since getting my machine fixed, I've completed these 2 projects. I love them both!

  1. Sophie Dress
  2. Jonah's "Huck Finn" Pants
The Sophie Dress (I'm just calling it that because I made it for Sophie) was a lot of fun and really simple. I used Simplicity 2707 for the majority of the dress. To make it mine, I added the apron. I thought it added a needed "different" dimension. What do you think?

While making this dress, I learned how to put in my very first zipper. Let me just tell you how I feel about zippers, I HATE THEM! From now on, I'll avoid them however I can. Don't laugh--it took me 2--2-- hours to put that stupid thing on.

I think I might add a fabric flower of some sort to the bodice as well.


The Jonah pants were amazingly easy. I used a pattern from a new book that I got called Weekend Sewing by Heather Ross. It's an adorable book with some great patterns and projects included. I'll be making many more of her projects in the future. I used the "Huck Finn" pattern in there for his pants. He got jealous when he saw me trying Sophie's dress on her and I told him I'd make him something. He was very excited when they were done and was oh so comfy and cute running around in them all day.


5.13.2009

happy mother's day

laptop bag for mom

This year for Mom's Day I decided to make something with my own 2 hands for my mom. I had a really fun time with this project. For a little intro, my mom is addicted to her computers. She never, ever, ever goes anywhere without her laptop. So, to break up the monotony of black laptop bags, I decided to make her one.

what i used:

1. yellowish linen for exterior
2. coordinating cotton for interior
3. coordinating thread
4. light quilt batting
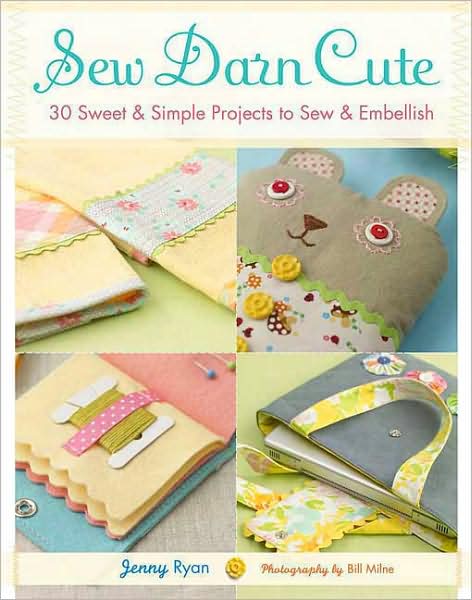
5. pattern from Sew Darn Cute

how it turned out:


4.28.2009

project #5 (special request)

baby leg warmers

Here is a cheap, easy way to make your baby some leg warmers. I, for one, am not willing to spend $11 or $12 bucks on a pair of leg warmers when I can make them in 5 minutes for a few bucks. These make great gifts and are very simple to make. Let's get started!

what you need:
  1. A cute pair of knee high socks. If you're making leg warmers for newborns, use a pair of girl's knee highs. For older babies, use women's knee highs. I have even used my husbands worn out socks to make some for my daughter. Just make sure the foot part isn't threadbare. It's OK if there are holes in the toes and heels because these parts will be cut out and discarded.
  2. Coordinating thread


here's how:


1. Cut the sock in a straight line just above the heel line. The leg part of the sock will be the main part of your leg warmer.


2. With the remaining part of the sock, cut in a straight line just below the heel and again just above the toe. Make sure you have straight edges on both ends of the remaining piece. This will be the upper cuff of the leg warmer.


3. Fold the cuff piece in half, right sides out, lining up the raw edges.


4. Find the raw edge of the leg warmer and tuck it inside the cuff piece lining up all 3 raw edges on top. Align the pattern as desired (it's not really necessary to align solids or stripes but argyles or other patterns might require a bit of tweaking).


5. Pin in place.


6. Sew around the end completely. Make sure you catch all 3 raw edges in your seam.


VOILA! You have an adorable leg warmer!! If you want 2, which I suspect you will, repeat steps 1-6.


4.27.2009

project #4

soft-sole baby shoes

There are tons of free patterns online to make your own soft-sole baby shoes. These shoes were a fun, fast project and are super cute! The great thing is that you probably have all the materials on hand already.

what you need:
You'll need some cute fabric scraps for the top and lining of your shoes. You'll also need some elastic (the amount depends on what size of shoes you'll be making). If you want to use a stronger material for the sole of the shoes, you can use either leather or a non-slip fabric (like they use on footy pajamas). You'll also need a pattern or if you're brave, you can come up with your own.


optional patterns:
I used this pattern. Here is a list of different links to patterns for making your own baby shoes.
I really wanted to find a pattern for mary janes but was unable to find a free one. So I'm currently working on coming up with one. I might just post it up here when it's done depending on my mood.


Here are some pictures of my final product. I'm very pleased and plan on making many more--maybe even some for Jonah!


4.09.2009

project #2

tie-dye...always an experiment

Sophie had some white onesies and I needed some tie-dye. The great thing about tie-dye is that you can't really mess up and the final product is always different!!

The Process:
  1. Mix your dyes according to package directions. This may require a little customizing and cutting corners if you don't want to mix the whole package of dye. You can also buy a tie-dye kit. For this project I used Dylon, which can be purchased at Wal-Mart or any craft store. I only mixed half of each package which still ended up being WAY more dye than we needed. TIP: Don't mix dye in bowls that you love because they may leave them stained. (I learned this the hard way and have stained my pink Williams-Sonoma mixing bowls.)
  2. Tie your shirts/clothing. There are numerous ways to do this depending on what effect you want. The ever-s0-popular spiral look is achieved by pinching the fabric where you want the center of the spiral to be, then spinning the fabric in one direction until you have a tight wheel of fabric. Secure with rubber bands. It doesn't really matter how many rubber bands you use. The dye will seep under the bands so they don't really provide a barrier to color. For other ideas on tying, go here or just search the Internet.

  3. Start dying! We used cups to pour the dye onto the fabric. It may be easier to use squirt bottles. We didn't have any so we improvised. You can also use a spray bottle to get a little splatter action going. TIP: If you want part of the fabric to remain white, don't POUR the dye on, just drizzle it. The dye tends to soak in really easily so go easy.

  4. Wait. Place each article of clothing in a separate plastic bag to keep it moist. For maximum results, let the dye sit for 24 hours before washing.

  5. Wash. First, you'll want to rinse the fabric in COLD water while it is still tied--until the water runs fairly clear. Then untie, and rinse again in HOT water until clear. Then wash your fabric in HOT water, using your regular laundry detergent.

These are simple directions compared to some you'll find on the Internet. I found that this process worked perfectly, however, and I had no need for the more technical instructions (like using soda-ash or synthrapol).

Pictures of the final products: